Schedules & Profiles
This page explains how signal-level injection options work in the current UI. Injection is configured per signal, and each signal can define how it starts, how long it runs, and how its value is encoded. These options live inside the signal injection dialog.
Opening Signal Injection Options
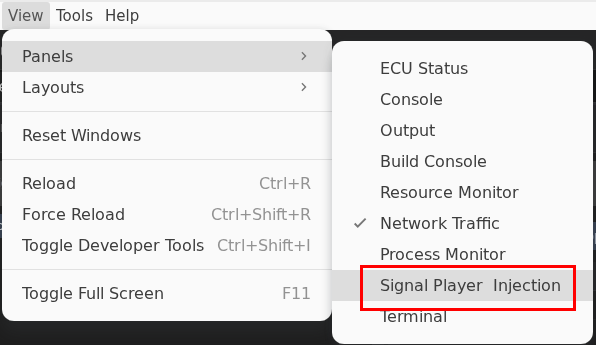
Step 1: Open Signal Player & Injection
Navigate to View > Panels > Signal Player & Injection to open the panel.
Step 2: Locate the Signal
In the Networks section, expand a network and locate the signal you want to inject.
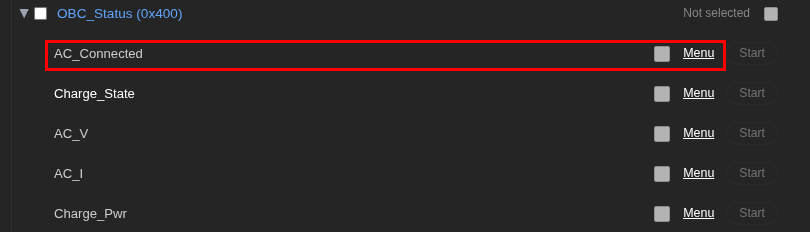
Step 3: Open the Signal Options Dialog
Click on the signal row to open the injection options dialog.
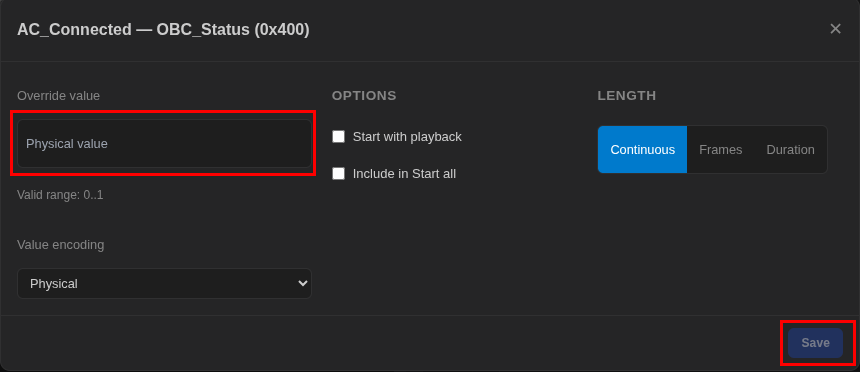
Step 4: Configure and Save
Configure the options described in the sections below, then click Save. Once saved, the signal is ready to participate in injection runs.
Override Value
The override value sets the injected signal value that will be sent during the run.
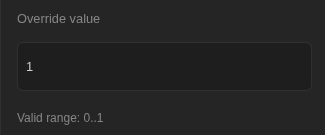
- Physical value lets you enter the real-world value (for example,
48.5 km/h). - The UI shows the Valid range so you do not accidentally send out-of-bounds values.
- Use a value that makes sense for the system under test so the ECU response is predictable.
Value Encoding
Encoding determines how the physical value is translated into the raw CAN payload.

- Physical uses the DBC scaling and offset, so the injected value respects engineering units.
- If your DBC includes multiple encodings, use the one that matches the signal definition your ECU expects.
A mismatch in encoding can cause the ECU to interpret injected values incorrectly, so verify your DBC is loaded and up to date.
Options
These toggles control when the signal starts and whether it participates in bulk actions.
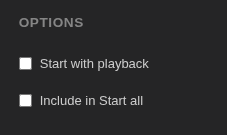
- Start with playback: begins injection as soon as playback starts. Use this when you need injected values to align with recorded datasets.
- Include in Start all: ensures the signal is included when you use the Start all button. Disable this for signals you want to trigger manually.
Length
Length controls how long the injection stays active.
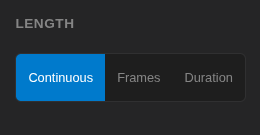
- Continuous keeps the value injected until you stop or pause injection.
- Frames sends a fixed number of frames, then stops.
- Duration sends for a specific time window, then stops automatically.
Use Frames or Duration when you need deterministic bursts or temporary overrides. Continuous is best for sustained overrides like sensor substitution.
Tips for Reliable Injection
- Configure only the signals you intend to override; leave others untouched to avoid confusing the ECU.
- Use Frames or Duration for fault injections so the system returns to normal automatically.
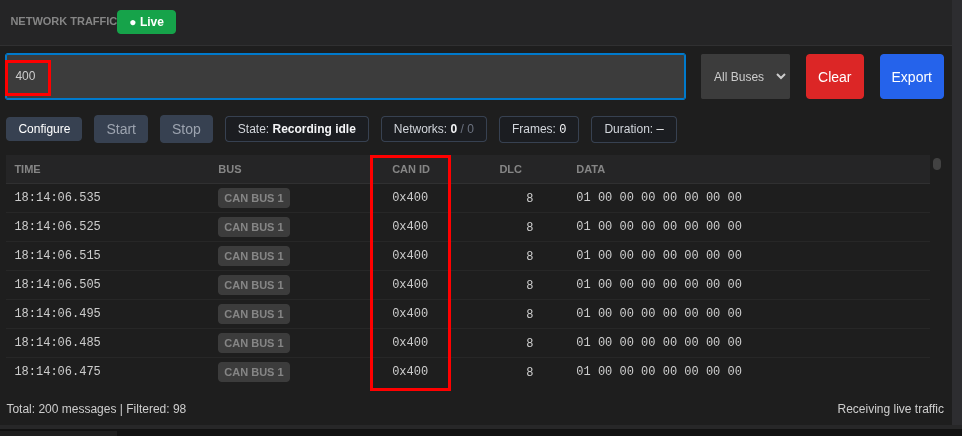
- Always verify injected signals in Network Traffic or Signal Chart immediately after starting.
- For repeatable setups, document the chosen signals and their options in your test plan so you can recreate the same configuration later.
Troubleshooting
| Issue | Suggested Fix |
|---|---|
| Signal does not inject | Confirm it is included in Start all or start it manually. |
| ECU response is unexpected | Check the override value and encoding type. |
| Injection stops too soon | Ensure Length is set to Continuous or adjust Frames/Duration. |
| Playback starts but injection does not | Enable Start with playback for the signal. |