Data Injection Overview
Data injection lets you transmit CAN frames from TrueFidelity while a system is running. Use it to simulate sensors, reproduce edge cases, or validate control strategies in a controlled environment. Injection is managed inside the Signal Player & Injection panel rather than a separate window.
When to Use Injection
- Simulate missing sensors or altered signals during bench testing.
- Reproduce field issues without waiting for exact conditions.
- Validate firmware responses to specific message sequences.
- Blend simulated messages with recorded playback traffic.
Safety First
- Perform injection only in controlled test environments.
- Keep a quick way to stop the system if something goes wrong.
- Document injected signals so results are traceable.
Starting Injection
Step 1: Start Your System
Before injection can work, your system must be running. Click the Start System button (play icon) in the main toolbar.

Wait until all ECUs show a green Running status in the ECU Status panel.
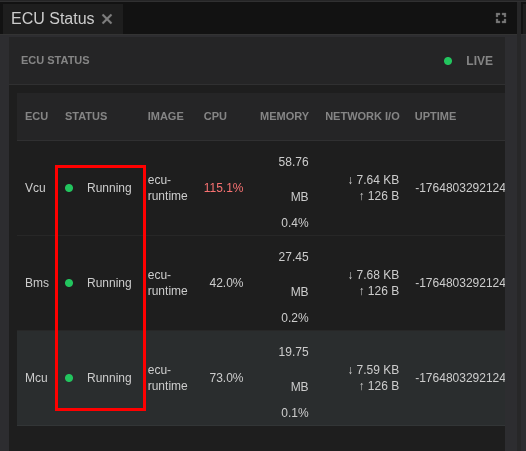
The status bar at the bottom should also confirm containers are running (e.g., "8 / 8 Containers Running").
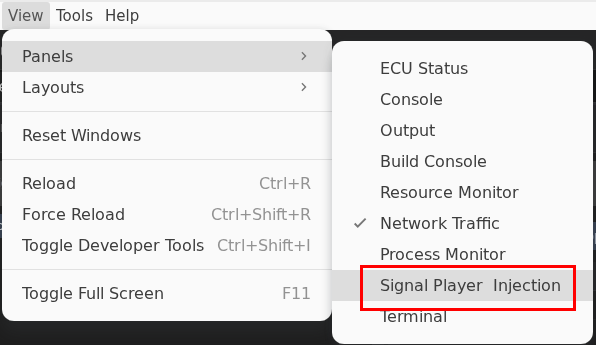
Step 2: Open Signal Player & Injection
Navigate to View > Panels > Signal Player & Injection to open the panel.
Alternatively, switch to the Network Analysis layout from View > Layouts > Network Analysis, which provides a comprehensive view for CAN bus analysis.
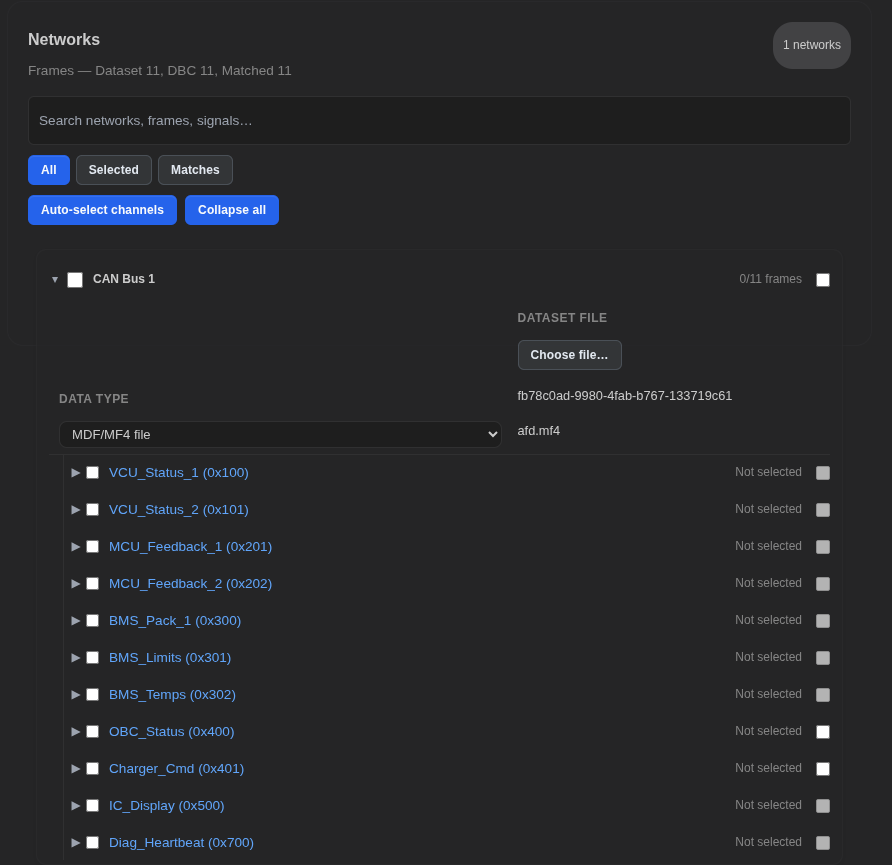
Step 3: Understand the Panel Layout
The Signal Player & Injection panel contains both playback and injection controls.
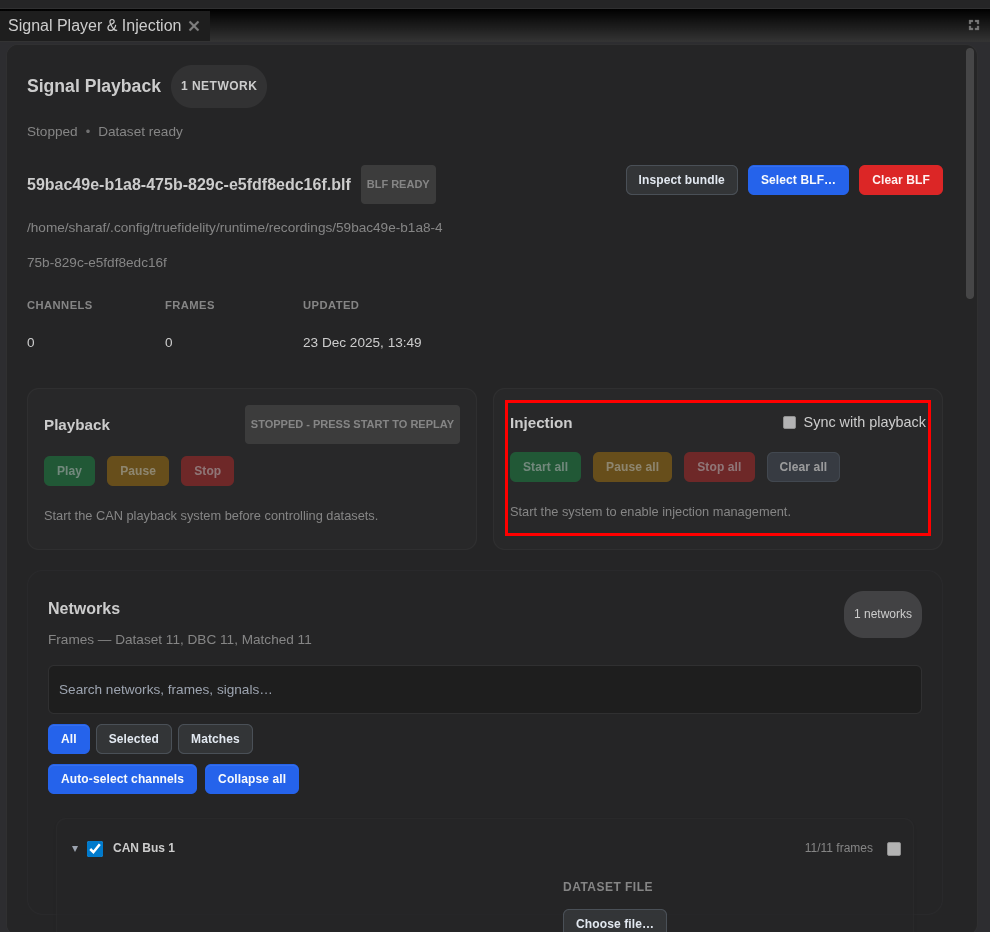
Key areas in the panel:
- Playback controls (left) - Play, Pause, Stop buttons for BLF dataset playback.
- Injection controls (right) - Start all, Pause all, Stop all, Clear all buttons.
- Sync with playback toggle - Align injection timing with playback.
- Networks list (bottom) - Shows matched frames between your dataset and DBC file. Verify the correct CAN bus is selected here.
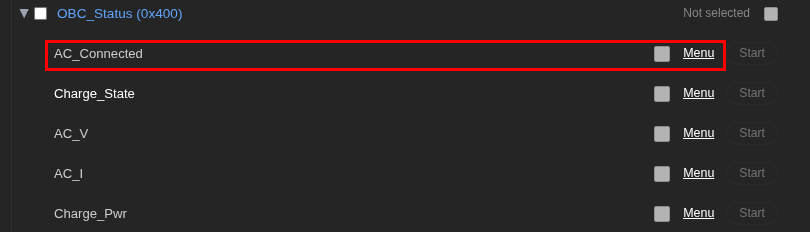
Step 4: Configure Signal Injection (Optional)
To configure individual signal values for injection, click on a signal in the network tree.
This opens the signal options dialog:
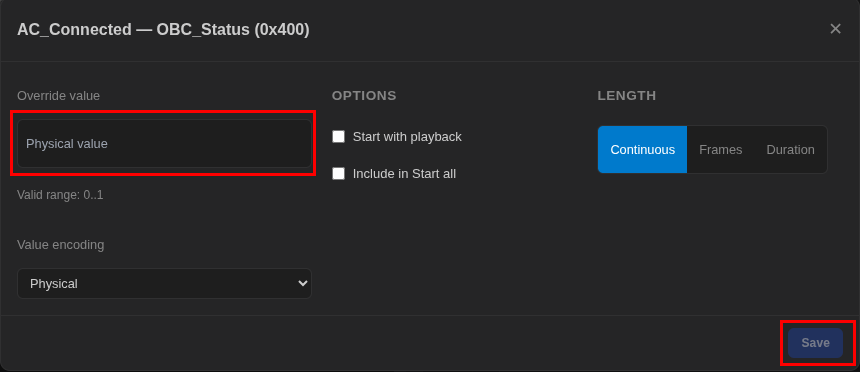
In the signal options dialog you can:
- Override value - Enter a physical value to inject (e.g., vehicle speed in km/h).
- Start with playback - Automatically begin injecting when playback starts.
- Include in Start all - Include this signal when using the Start all button.
- Length - Choose Continuous, Frames count, or Duration-based injection.
- Value encoding - Select Physical or Raw encoding.
After configuring the signal options, click Save to confirm. Then select the signal for injection by clicking on its checkbox in the signal tree.
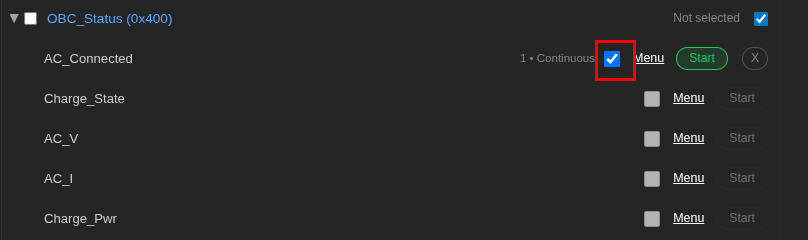
Step 5: Start Injection
Use Start all to begin injecting all configured signals. The button turns active (green) when the system is running.
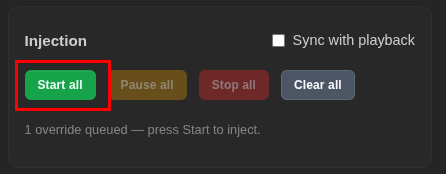
Step 6: Control Injection
- Pause all - Temporarily stop sending without clearing state.
- Stop all - End injection and reset the run.
- Clear all - Remove pending injection items from the queue.
Step 7: Sync with Playback (Optional)
If you need injection to line up with recorded playback data, enable Sync with playback before pressing Play. This ensures injected signals start at the same time as playback.
Verifying Injection
Once injection is active, use these panels to confirm frames are being transmitted correctly.
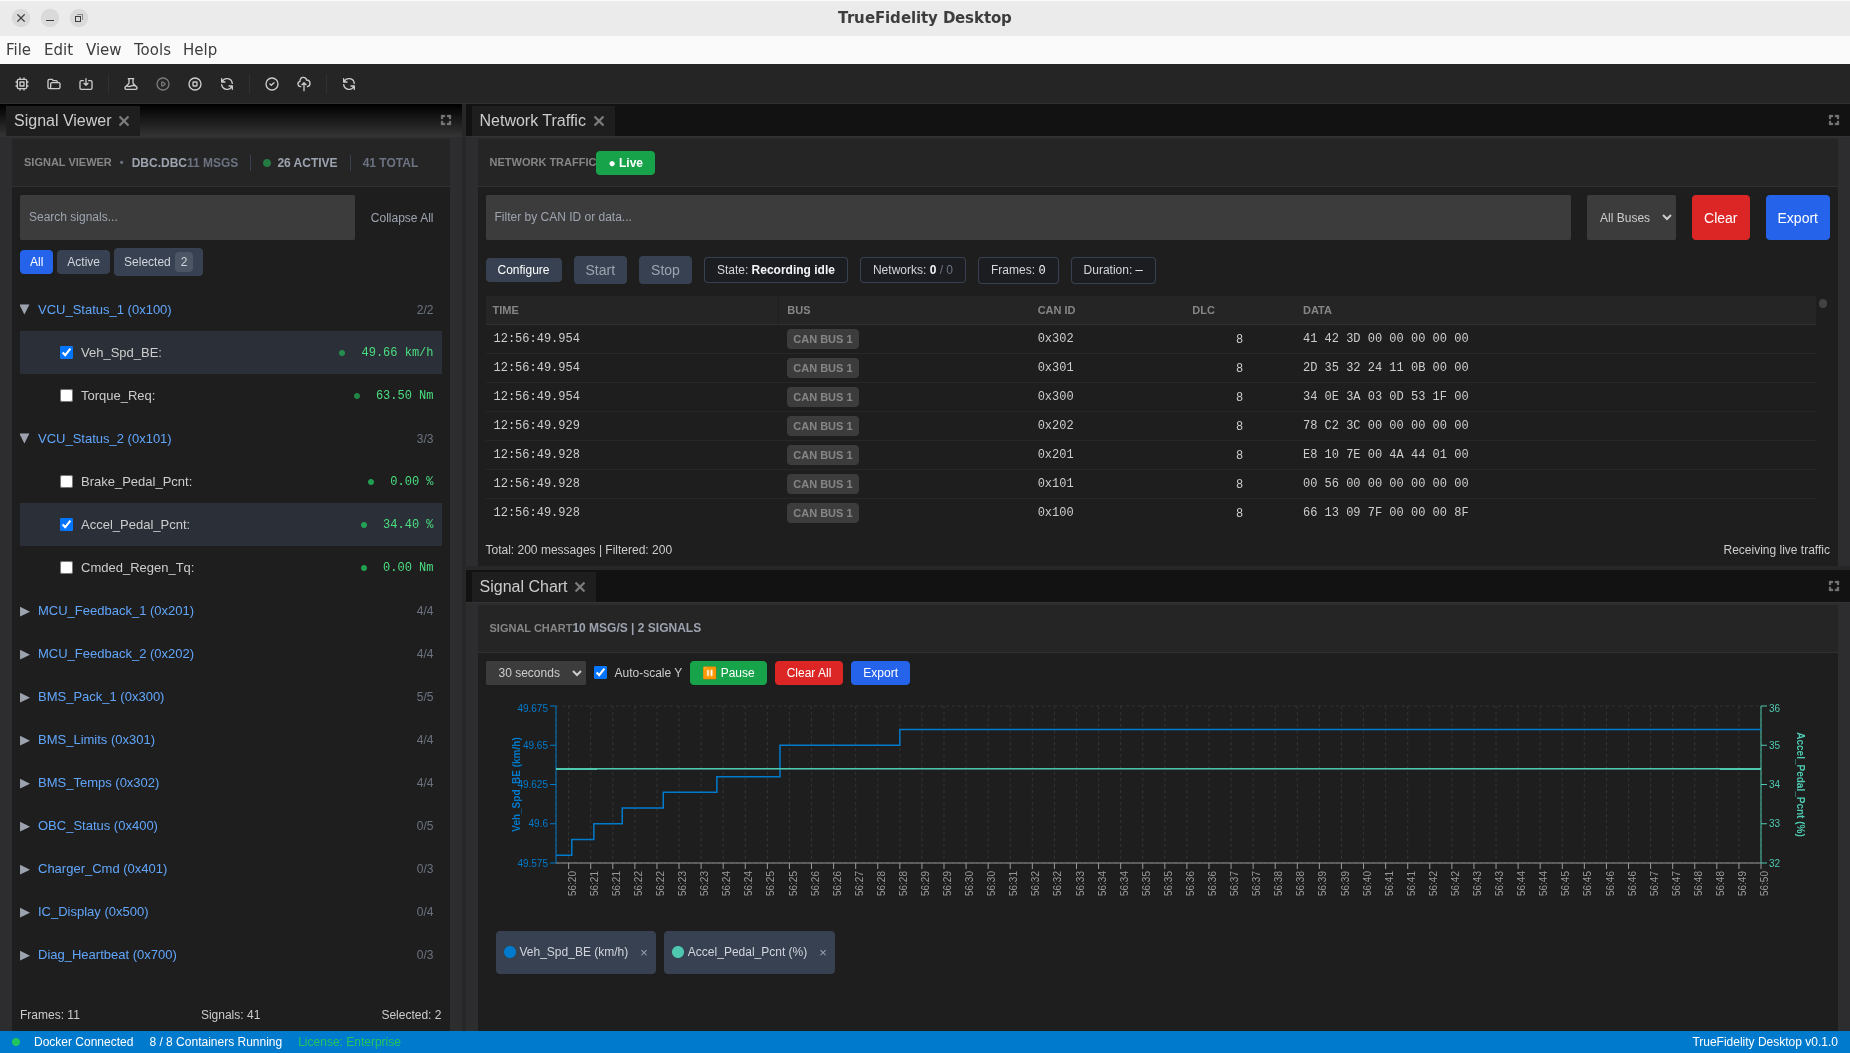
Watch Network Traffic
Open the Network Traffic panel to see live CAN frames on the bus. Injected frames appear alongside other traffic.
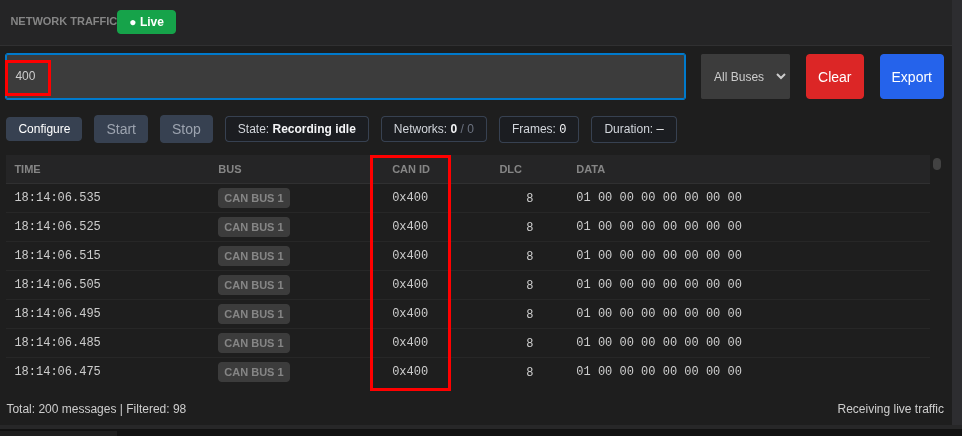
Look for:
- Live indicator - Green "Live" badge confirms real-time capture.
- CAN ID column - Verify your injected frame IDs appear.
- DATA column - Check that data bytes match expected values.
- Filter - Use the filter box to isolate specific CAN IDs.
Check Signal Viewer
The Signal Viewer panel shows decoded signal values in real time. Expand frames to see individual signals update as injection runs.
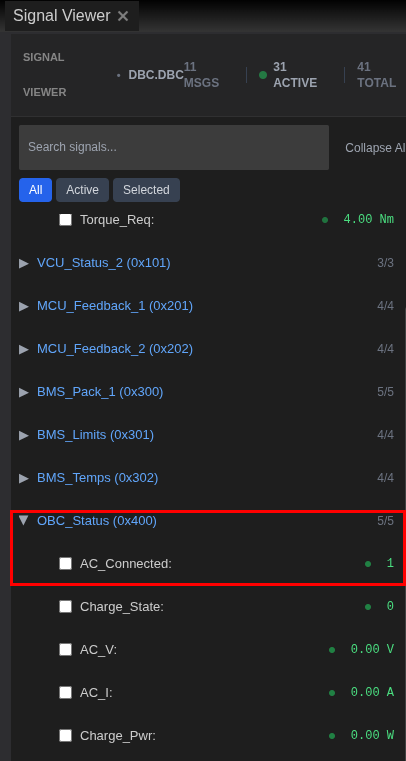
Key indicators:
- Green dots - Signals receiving live updates.
- Real-time values - Current decoded values (e.g., 48.67 km/h).
- Active count - Number of signals currently updating.
Monitor ECU Console
Keep the ECU Console open to catch any runtime errors or unexpected behavior from ECUs responding to injected signals.
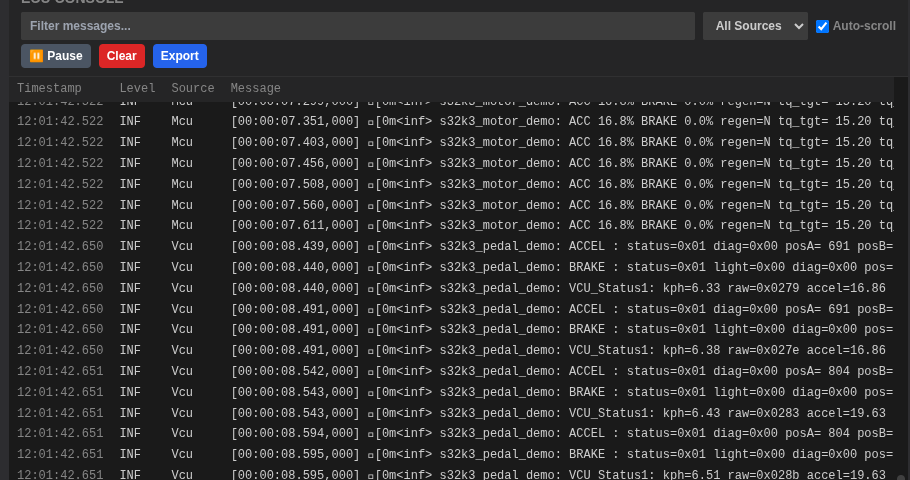
Use the console to:
- Filter by source - Select specific ECU logs from the dropdown.
- Watch for errors - Look for ERR or WRN level messages.
- Pause scrolling - Click Pause to inspect specific log entries.
Troubleshooting Injection
| Issue | Suggested Fix |
|---|---|
| Injection controls disabled | Start the system and confirm the runtime is connected. |
| Frames not visible | Check the selected network and verify traffic appears in Network Traffic. |
| Playback works but injection does not | Disable Sync with playback and try Start all manually. |
| Injection causes instability | Stop injection and verify ECU configuration and bus load. |
| Signal values not updating | Ensure the DBC file is loaded and signals are selected in Signal Viewer. |
Next Steps
- Review Playback for dataset setup and channel mapping.
- Use Filters & Search to isolate injected frames quickly.
- Refer to Controls & Panels for a deeper panel walkthrough.